Our Pick: Vicks
Check price on Amazon →How to Use a Dry-Herb Vaporizer (2026): The Full Method
Six steps, and most people get two of them wrong. Grind medium-fine, pack the chamber the way your maker specifies, start somewhere in the middle of the range (commonly cited as 180 to 190 C, or 356 to 374 F), draw slowly rather than hard, stir between draws on a conduction device, and stop when the material is evenly browned. Then clean it, because that is the step that decides how the next twenty sessions go.
By The Herbal Vaporizer DeskUpdated 2026-09-05~10 min read Ranked on verified output, never box claimsHow we research
The short version, because you may have a new device in front of you right now. Grind your material to a medium-fine, even texture, roughly the consistency of coarse ground coffee. Pack the chamber the way your maker specifies, which is usually full but not compressed. Choose a starting temperature in the middle of the usable band, commonly cited as around 180 to 190 C, or 356 to 374 F. Draw slowly and steadily rather than hard and fast. On a conduction device, stir between draws. Stop when the material is an even light brown all the way through, and clean the airpath before it becomes a job.
Two of those steps are where nearly every disappointing first session comes from. The first is the grind: a vaporizer works by moving hot air through packed material, so an uneven grind lets air channel through the gaps, scorching some of the load while leaving the rest untouched. The second is the draw: people arrive from other habits pulling hard and fast, which drags air through the chamber faster than the heater can warm it, and the result feels thin and disappointing even on an excellent device. Both are free to fix.
A note on where these numbers come from, because we run a research and verification desk rather than a test lab. The temperature bands here are the ranges makers publish and that owners consistently converge on, cross-checked across the sources we track. Treat them as reliable starting points and not certifications, because devices differ, material differs, and your own preference is the final vote. Manufacturer instructions always outrank general advice, including ours: if your maker's manual contradicts anything on this page about packing, cleaning or maintenance, follow the manual. This is device guidance for legal herbal material, and nothing here is medical, dosing, or health advice.
The short version
- Grind medium-fine and even, roughly coarse-ground-coffee texture. Not powder, which packs into an airtight plug and clogs screens, and not chunks, which let hot air channel around them.
- Pack per your maker's guidance. Most chambers want to be full but not compressed; a hard-tamped load restricts airflow and an under-filled one lets air rush past the material.
- Start in the middle of the range. A commonly cited middle ground is 180 to 190 C, or 356 to 374 F. Go lower for flavour, higher for denser vapour, and adjust upward during a session.
- Draw slowly. A long, gentle pull gives the air time to pick up heat on its way through the material; a hard fast pull outruns the heater and produces thin results on any device.
- Stir between draws on conduction units, because the chamber walls heat from the outside in. Stop when the material is evenly light brown, then clean the airpath before residue builds.
Our top-rated vaporizers
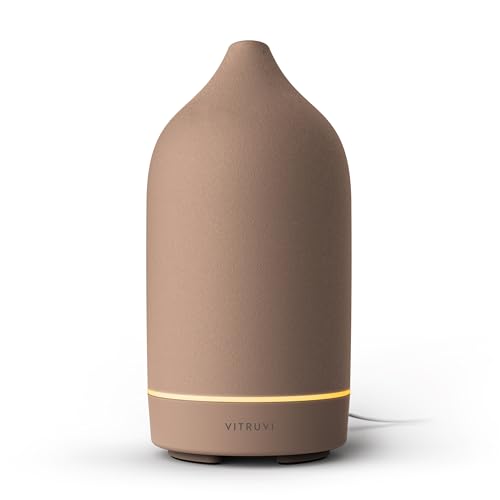
Whatever you decide, these are the picks we recommend across every category, ranked on verified output and value. Live price check on each.


As an Amazon Associate we earn from qualifying purchases, at no cost to you.
What you'll need
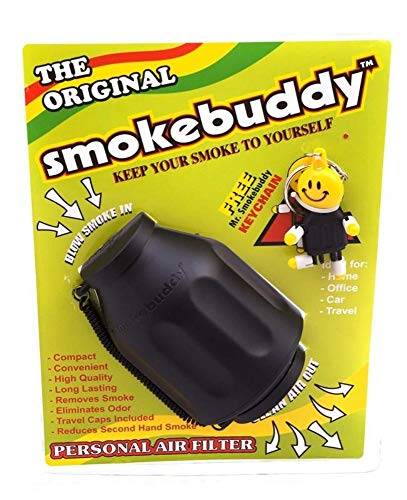
The six things that do the real work around a dry-herb vaporizer: a grinder that produces an even, fluffy grind, humidity control so the material vaporizes properly, and the cleaning supplies that keep flavor honest. Prices are approximate at time of writing.



Step one: grind medium-fine, and get it even
This is the step that decides more about a session than the device does, and it is the one most first-time owners underweight. A dry-herb vaporizer heats air and moves it through a packed bed of material, which means the bed is functionally part of the machine. Airflow through a packed bed follows the path of least resistance, exactly like water finding a channel downhill. Load a chamber with a mix of powder and pea-sized chunks and the air carves a route through the loose spots, over-extracting whatever sits along that route while the rest stays cool and green. Owners describe that as a session that was harsh at the start and did nothing by draw four. Almost every time, the grind is why.
The target texture is medium-fine and uniform, roughly the consistency of coarse ground coffee. Fine enough that surface area is high and heat penetrates quickly, coarse enough that air can still travel through the bed rather than being blocked by it. Powder is the opposite error and just as damaging: it compacts into a dense plug the moment you tamp it, chokes the draw entirely, and migrates through screens into the airpath where it becomes a cleaning problem rather than a session.
Two or three full turns in a decent three-piece grinder is usually the whole technique. The tool matters here because tooth geometry is what produces even output: shredding teeth slice material apart and leave it porous, while blunt crushing pegs mash it flat and generate fines. The Santa Cruz Shredder 3-piece medium at $59.90 is the reference product for this, and the full field is ranked in best herb grinders.
Step two: pack the chamber the way your maker says
Packing is where manufacturer guidance genuinely differs between devices, so this section gives you the principle and then tells you to read your manual. The principle is that a chamber wants to be full but not compressed. A full chamber means the incoming air has to work through material rather than around it. Not compressed means the bed stays porous enough for air to actually move.
Under-filling is the more common beginner error and it produces a specifically disappointing result: air rushes through the empty headroom above a thin layer, barely contacting the material, and the device feels weak on a setting that should be productive. Over-tamping produces the opposite failure: a restricted, effortful draw and uneven extraction, because air cannot penetrate a compressed plug and instead finds the gap at the chamber wall.
Where makers differ is in the specifics, and the differences are real. Some conduction devices genuinely want a firmer pack because chamber-wall contact is how heat gets in. Some convection devices want a lighter one to preserve airflow. Devices built around a removable glass stem load the stem rather than a fixed oven and behave differently again. Read the manual once; the instruction is usually a single sentence and it is worth having right.
Step three: choose a starting temperature
The range commonly discussed for dry herb is roughly 160 to 220 C, which is about 320 to 430 F. Within that band the trade is consistent and easy to remember: lower temperatures favour flavour and produce lighter, thinner vapour; higher temperatures produce denser, warmer vapour and extract faster at the cost of some of the delicate character. Neither end is correct. They are different sessions.
As a starting point, the middle of the band is the sensible default, and a figure commonly cited as a middle ground is around 180 to 190 C, or 356 to 374 F. It is warm enough to produce visible vapour without effort and cool enough to leave flavour intact, which makes it a good place to learn what your device feels like before you start moving the dial. From there, adjust in small increments rather than large ones, because a ten degree change is more noticeable than most people expect.
The other technique worth knowing early is stepping up during a session. Start at the lower end, run a few draws, then raise the temperature ten to fifteen degrees at a time as vapour production drops off. This extracts progressively rather than all at once, and most owners find it produces a longer and more consistent session than picking one number and sitting on it. The full breakdown of what changes at each band is in the dry-herb vaporizer temperature guide.
Step four: draw slowly, and let the heater keep up
If one habit separates a satisfying session from a thin one on the same device at the same setting, it is draw speed. Draw slowly and steadily, over several seconds, with gentle suction rather than force. The reason is mechanical: in a convection device the air has to pick up heat on its way through the chamber, and air pulled through quickly simply does not spend enough time in contact with the heater to arrive hot. Pull hard and you are moving cool air across your material, which produces very little.
People arriving from combustion habits almost always pull too hard for the first few sessions, because a lit bowl rewards a fast draw and a vaporizer punishes it. The correction is deliberate: think of it as sipping rather than pulling. Many owners find that a slower draw at a moderate temperature produces denser vapour than a hard draw at a high one, which is a useful thing to discover early rather than after you have concluded the device is faulty.
Timing differs by device class. Session devices heat a whole chamber and hold it hot across a series of draws over several minutes, so the rhythm is a slow pull, a pause, and another. On-demand devices heat only while you are drawing, which changes that rhythm entirely and rewards fewer, more deliberate draws. Battery-free designs that you bring up to temperature with an external flame or induction coil have their own cadence, built around heating the tip and drawing through a defined window. Whichever you own, slow is still the instruction.
Step five: stir between draws, especially on conduction devices
Stirring is the step most people skip and then wonder why half their chamber came out untouched. It matters most on conduction devices, where heat enters the material by direct contact with the hot chamber walls. That means the outside of the load heats first and the centre heats last, so without intervention you finish a session with a browned ring and a green core.
The fix is simple: after two or three draws, open the chamber and stir the material with a small tool so that what was against the walls moves inward and what was in the middle moves out. Many devices ship with a packing or stirring tool for exactly this, and official maintenance kits usually include one, such as the PAX Premium Maintenance Kit at $14.99.
Convection devices need it less, because hot air travels through the whole bed rather than heating from the outside in, but a stir mid-session still evens things out if your pack was uneven to begin with. Hybrids sit in between. Which category your device falls into is worth knowing, and convection vs conduction explains how to work out which heating method a device uses.
Step six: know when it is finished, and clean it
The visual cue is the reliable one: material is done when it is an even light-to-medium brown all the way through, dry and slightly crumbly. Green patches mean there is more left and the load could use a stir and a temperature step up. Dark brown or black means you have gone past the useful range, and at that point you are heating spent material rather than extracting anything, which contributes nothing but harshness.
Empty the chamber while it is still warm, because spent material lifts out cleanly then and becomes stubborn once everything has cooled and set. Tip it out, brush the chamber, and put the device down. That thirty second habit is the single biggest predictor of whether your device still draws freely in six months.
The deeper clean is a periodic job rather than a per-session one, and the rules are strict because this is where expensive mistakes happen. 99 percent isopropyl alcohol goes on glass and steel parts your maker has cleared for soaking, and nowhere else. Not on plastic housings, not on batteries, not on anything with electronics. ForPro 99 percent, 32 oz, is $9.99. The chamber itself gets a barely dampened cotton swab on a fully cooled device, and 1,500 Q-tips cost $7.96. The airpath gets a hard-bristle pipe cleaner, which is what fixes a draw that has slowly tightened. The full routine, including how often, is in how to clean a dry-herb vaporizer.
The mistakes that ruin new-owner sessions
Expecting smoke. Vapour is thinner, cooler and often nearly invisible at lower temperatures, and a lot of new owners conclude their device is broken when it is simply working as designed. If you want to see visible clouds, that lives at the higher end of the temperature band, and it comes at a cost in flavour.
Pulling too hard. Covered above, and worth repeating because it is the single most common error. Slow, gentle, long. If the vapour feels thin, slow down before you turn the temperature up.
Grinding to dust. Powder feels like it should be better and is actively worse: it compacts, blocks airflow, and gets into the airpath through screens. Medium-fine, not fine.
Skipping storage. Material that has dried out crumbles to powder in the grinder no matter how good the grinder is, and material that is too damp clumps and heats unevenly. A sealed jar and a two-way pack removes the variable entirely, and the whole storage stack is covered in best vaporizer accessories.
Never cleaning it. Residue builds in the airpath gradually enough that you adapt to the worsening draw without noticing, and then one clean makes the device feel new. Set a habit rather than waiting for a problem.
How to use a dry-herb vaporizer
- 1
Grind medium-fine and even
Grind your material to an even, medium-fine texture, roughly the consistency of coarse ground coffee. Two or three full turns in a three-piece grinder is usually enough. Avoid powder, which compacts and blocks airflow, and avoid uneven chunks, which let hot air channel around them.
- 2
Pack the chamber per the maker's guidance
Load the chamber full but not compressed, unless your manufacturer specifies otherwise. Under-filling lets air rush past the material; over-tamping restricts the draw and causes uneven extraction. Check your manual, since conduction and convection devices differ.
- 3
Choose a starting temperature
Set a temperature in the middle of the usable band. A commonly cited middle ground is around 180 to 190 C, which is about 356 to 374 F. Lower favours flavour and lighter vapour; higher produces denser, warmer vapour. Adjust in small steps.
- 4
Draw slowly and steadily
Take a long, gentle draw over several seconds rather than a short hard pull. Air needs time in contact with the heater to arrive hot, so a fast draw moves cool air across your material and produces thin results even on an excellent device.
- 5
Stir between draws on conduction devices
After two or three draws, stir the chamber with the supplied tool so material that was against the hot walls moves inward. Conduction devices heat from the outside in, so stirring is what prevents a browned ring around a green core. Let the device cool before handling internals.
- 6
Stop when the material is evenly browned
Material is finished when it is an even light-to-medium brown all the way through and slightly crumbly. Green patches mean stir and step the temperature up; dark brown or black means you have gone past the useful range.
- 7
Empty and clean
Tip the spent material out while the chamber is still warm, since it lifts cleanly then. Periodically clean the airpath with a hard-bristle pipe cleaner and the chamber with a barely dampened cotton swab on a fully cooled device. Use 99 percent isopropyl only on glass and steel parts your maker has cleared for soaking, never on plastics or electronics.
Ready to buy? Start with our top picks
Whatever this guide steered you toward, here's where most readers land, ranked on verified output and value. Live price check on each.
As an Amazon Associate we earn from qualifying purchases, at no cost to you.
Key terms
- Medium-fine grind
- The target texture for a vaporizer chamber, roughly coarse-ground-coffee consistency. Fine enough for even heating, coarse enough that air can still travel through the packed bed rather than being blocked by it.
- Channeling
- What happens when air finds a low-resistance route through an unevenly packed chamber, over-extracting the material along that route while leaving the rest untouched. It is the mechanical explanation for a session that starts harsh and ends empty.
- Session device
- A vaporizer that heats a whole chamber and is used across a series of draws over several minutes. Distinct from an on-demand device, which heats only while you draw and is used in shorter bursts.
- Stepping up
- Starting a session at the lower end of the temperature range and raising it in ten to fifteen degree increments as vapour production drops. It extracts progressively rather than all at once, and most owners find it gives a longer, more consistent session.
- Evenly browned
- The visual cue for a finished load: a uniform light-to-medium brown all the way through. Green patches mean the load is not done; dark brown or black means it has been taken past the useful range.
Questions, answered
How do you use a dry-herb vaporizer for the first time?
Grind medium-fine and even, roughly coarse-ground-coffee texture. Pack the chamber full but not compressed, or however your maker's manual specifies. Set a temperature in the middle of the range, with 180 to 190 C, about 356 to 374 F, being a commonly cited middle ground. Draw slowly over several seconds rather than pulling hard. Stir after a few draws if your device is a conduction unit. Stop when the material is evenly light brown, then tip out the chamber while it is still warm.
What temperature should I set a dry-herb vaporizer to?
The band commonly discussed for dry herb is roughly 160 to 220 C, which is about 320 to 430 F. Lower temperatures favour flavour and produce lighter vapour; higher temperatures give denser, warmer vapour and extract faster. A sensible starting point is the middle, commonly cited as around 180 to 190 C or 356 to 374 F. Many owners then step up ten to fifteen degrees at a time during a session as vapour production drops, which extracts progressively rather than all at once.
How fine should I grind for a vaporizer?
Medium-fine and even, about the consistency of coarse ground coffee. That is fine enough for heat to penetrate quickly and coarse enough that air can still move through the packed bed. Grinding to powder is the common overcorrection and it backfires: dust compacts into an airtight plug, chokes the draw, and works through screens into the airpath where it becomes a cleaning problem. Two or three full turns in a three-piece grinder is usually the entire technique.
Why is my dry-herb vaporizer not producing much vapour?
In order of likelihood: you are drawing too fast, the grind is uneven, the chamber is under-packed, the material is damp, or the airpath needs cleaning. Draw speed is the most common cause by a wide margin, because air needs time in contact with the heater to arrive hot. Fix that first, then check the grind and the pack. Damp material also spends the early part of a session driving off water, which reads as a slow or weak device.
Do you need to stir a dry-herb vaporizer?
On conduction devices, yes, and it makes a visible difference. Conduction heats material by contact with the chamber walls, so the outside of the load cooks first and the centre last. Stirring after two or three draws moves the outer material inward and prevents a browned ring around a green core. Convection devices need it less because hot air passes through the whole bed, but a mid-session stir still evens out an imperfect pack. Let the device cool before handling internals.
How do you know when a vaporizer bowl is finished?
Look at it. Finished material is an even light-to-medium brown all the way through and slightly crumbly. If you see green, there is more available: stir the chamber and step the temperature up ten to fifteen degrees. If it is dark brown or black, you have taken it past the useful range and are now heating spent material, which adds harshness and nothing else. Empty the chamber while it is still warm, since spent material lifts out cleanly then and sticks once cold.
Should you hold in vapour or draw for longer?
Draw length is the variable that matters mechanically, not breath holding. A long, slow draw gives air time in contact with the heater so it arrives hot at the material, which is what produces vapour. A short hard pull moves cool air through the chamber and produces very little regardless of temperature setting. If your vapour feels thin, slow the draw down before you reach for the temperature control.
How often should you clean a dry-herb vaporizer?
Empty the chamber after every session while it is still warm, which takes thirty seconds and prevents most problems. Beyond that, a light clean of the airpath and mouthpiece every week or two of regular use keeps the draw free, and a deeper clean of removable glass and steel parts when the draw tightens or flavour dulls. Use 99 percent isopropyl only on parts your manufacturer has cleared for soaking, never on plastics, batteries or electronics, and always follow the maker's instructions first.
Filed under Explainer
Part of Dry-Herb Accessories & Care
Keep reading
Dry-Herb Vaporizer Temperature Guide
What changes at each band from 160 to 220 C, and why grind and moisture shift the result.
Convection vs Conduction Vaporizers
Which heating method your device uses, and why it decides whether you need to stir.
How to Clean a Dry-Herb Vaporizer
The isopropyl rules, the Q-tip method, and how often each part actually needs doing.
Best Herb Grinders (2026)
The tool behind step one, ranked on output consistency and tooth design, from $12.50.